BEST PRACTICE WINDOW INSTALLATION
* This project has been selected as one of three finalists in the Innovation in Sustainability category for the CaGBC’s Toronto Chapter Innovation in LEED awards. Drop by the site for a tour on Saturday October 4th as part of Ontario Sustainable Energy Association’s Green Energy Doors Open Event.
—
We recently installed high performance windows at our Deep Energy Retrofit project at 4 Beechwood Crescent. Our primary goals for this installation were to maintain the continuity of our air barrier and drainage plane, and to achieve an efficient and reproducible installation method. This best practice method is now a GH standard for window installation on all of our jobs.
The Window
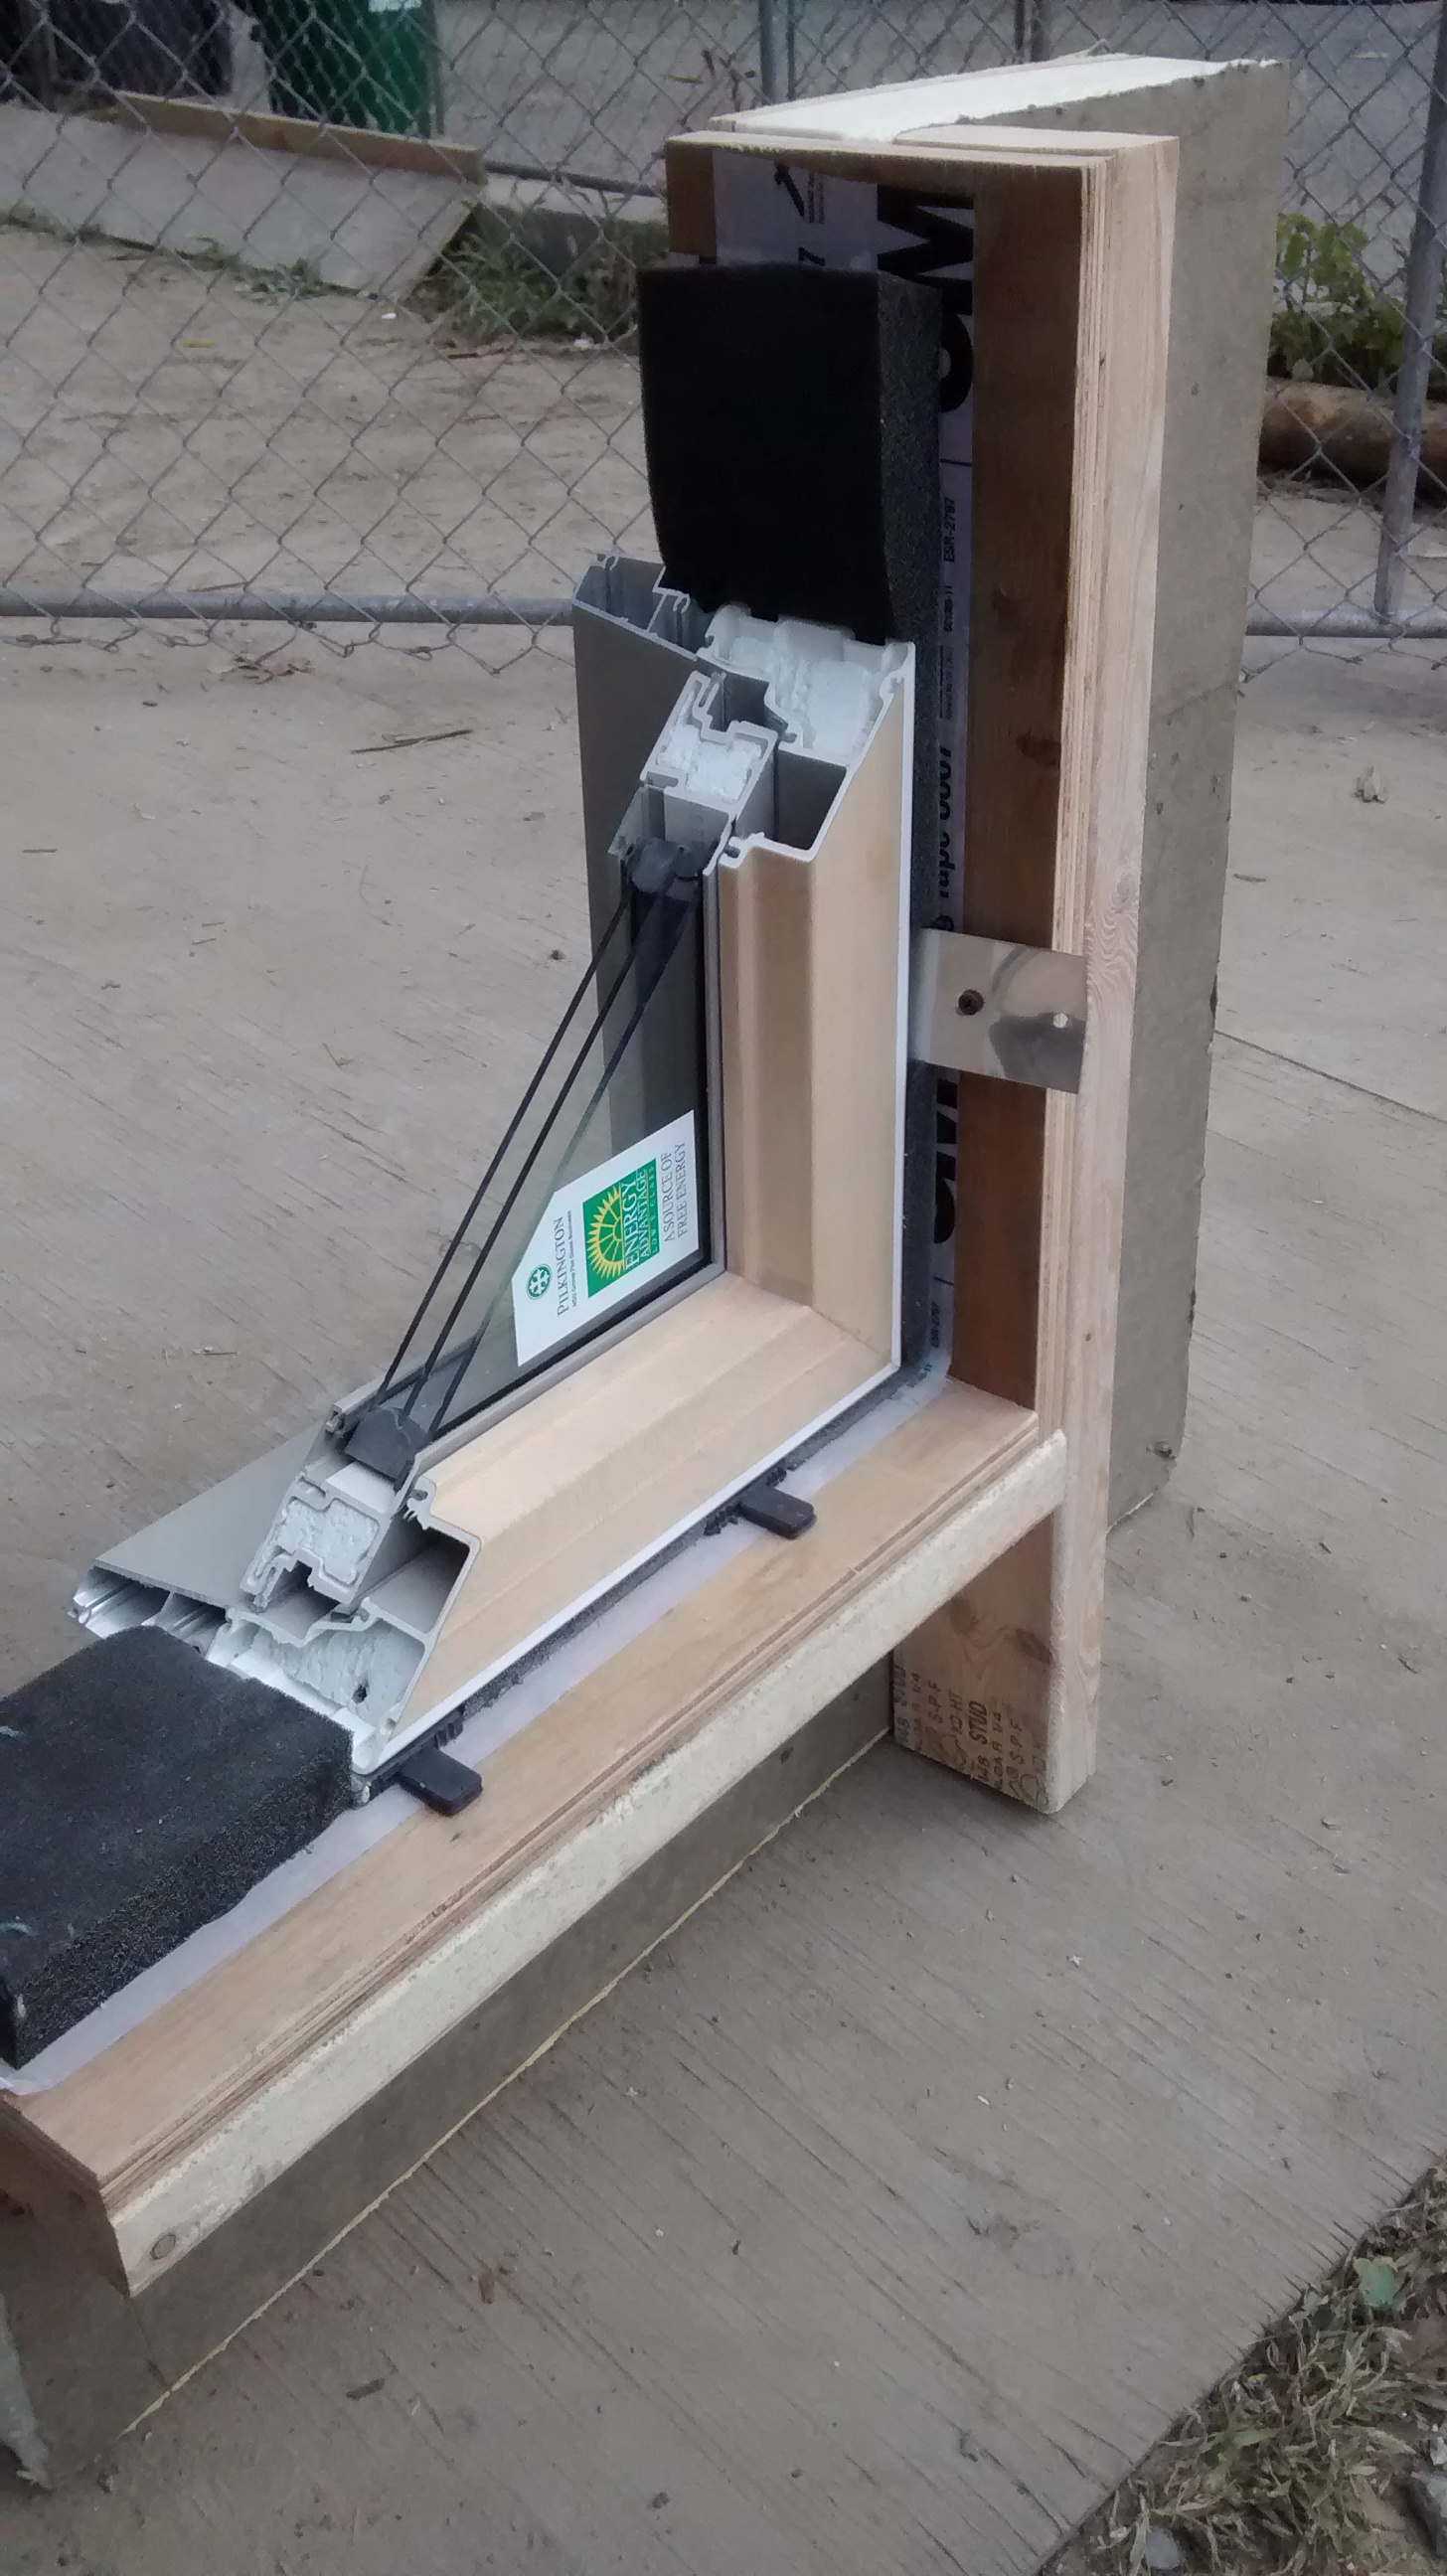
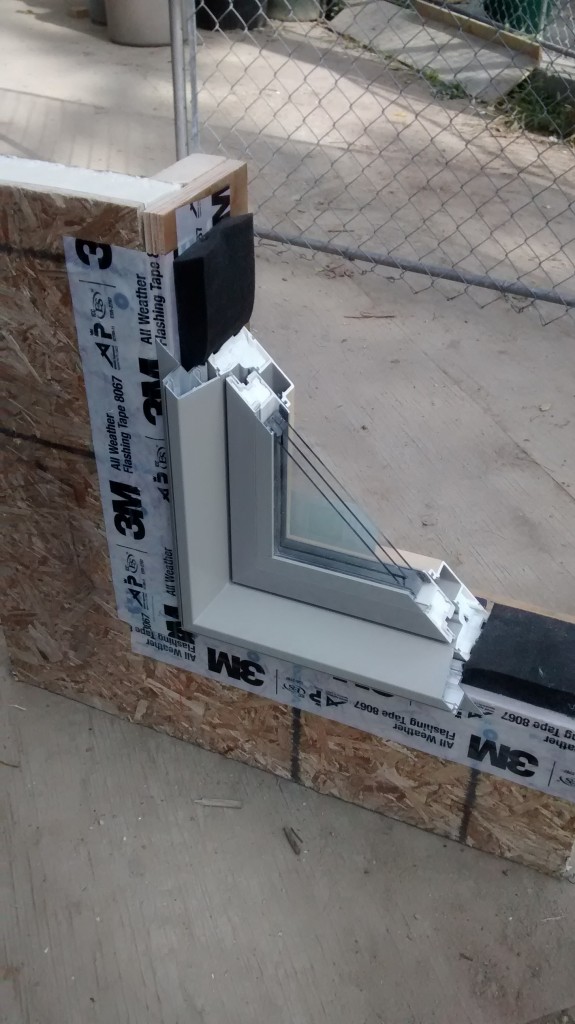
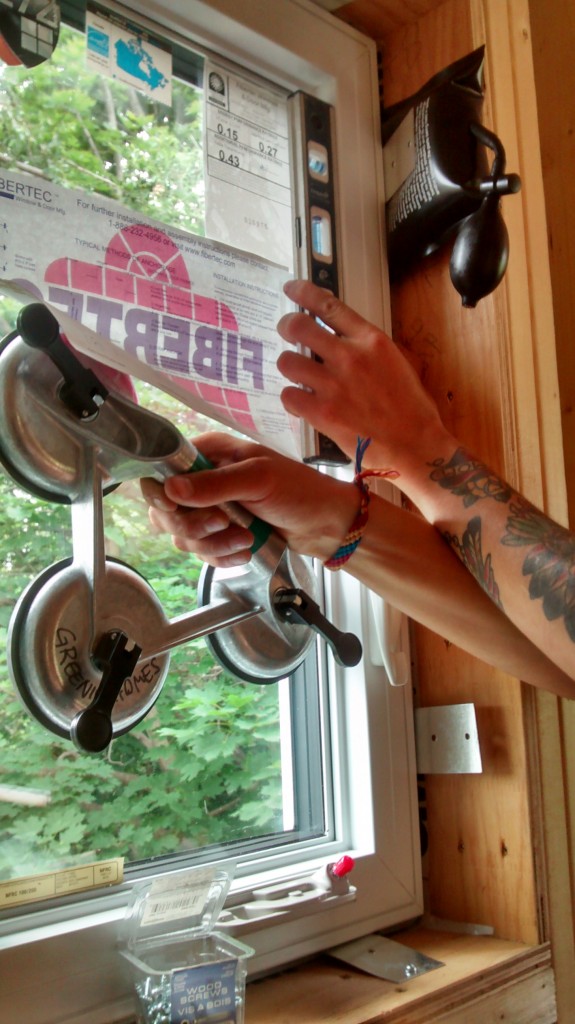
For this project we used windows and doors manufactured by Fibertech, located in Toronto. The glazing is triple pane with an argon gas fill and warm-edge spacers. The frames are closed fibreglass sections with EPS insulation. We also ordered an optional exterior aluminum moulding with integral nailing flange. The moulding had a deep return to recess the window back in the opening (closer to the middle of our insulation layer) and facilitated air and weather sealing. Being an extruded section, it also looks a lot better than site-bent thin-gauge capping. Lastly, we ordered strap anchors to secure the windows without having to make holes in the frames.
Specialized Installation Materials and Tools
We used some cutting edge materials and innovative tools to complete the window installations. Here’s a list and there’s a detailed explanation in the description of the installation process below:
- Air Shims: A small bag inflated by an attached hand pump that allows for precise shimming. I can’t emphasize how amazing these are; we are also finding them tremendously useful for interior door and trim installation!
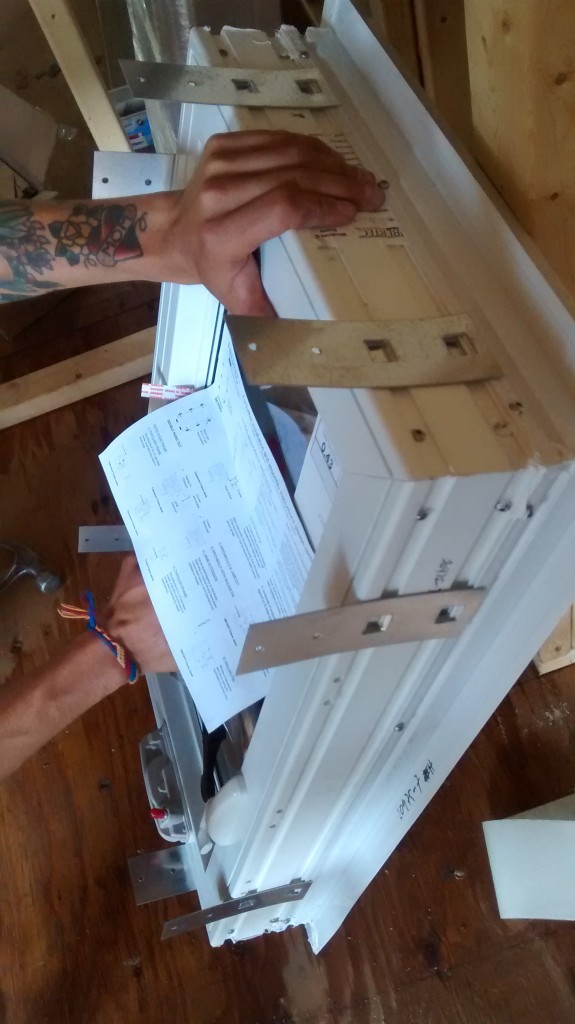
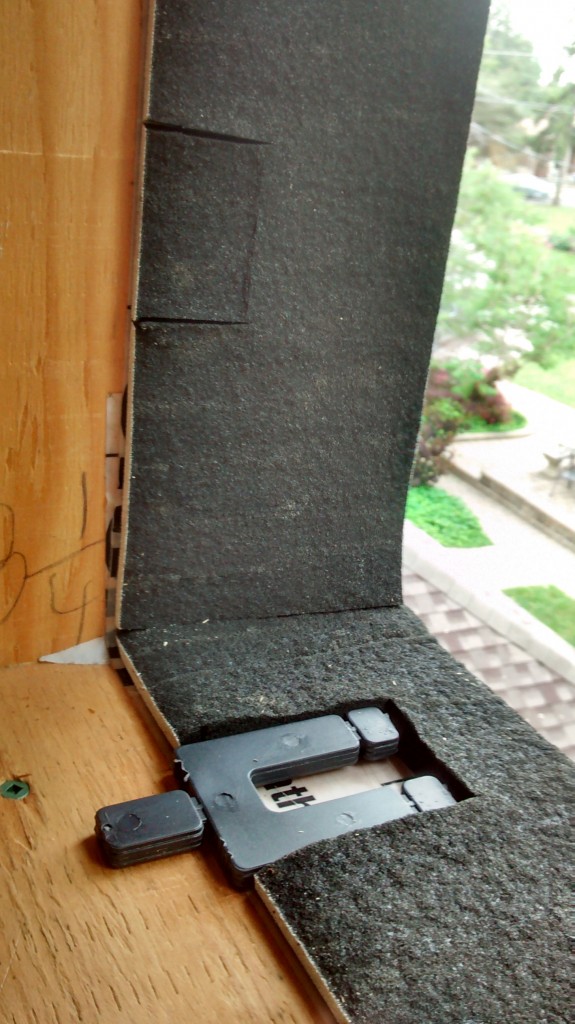
- U-Shims: A stacked, break-away shim in a “U” shape which allows for a fastener to be easily set through it.
- Expanding Foam Tape: In this case Trio supplied by Tremco.
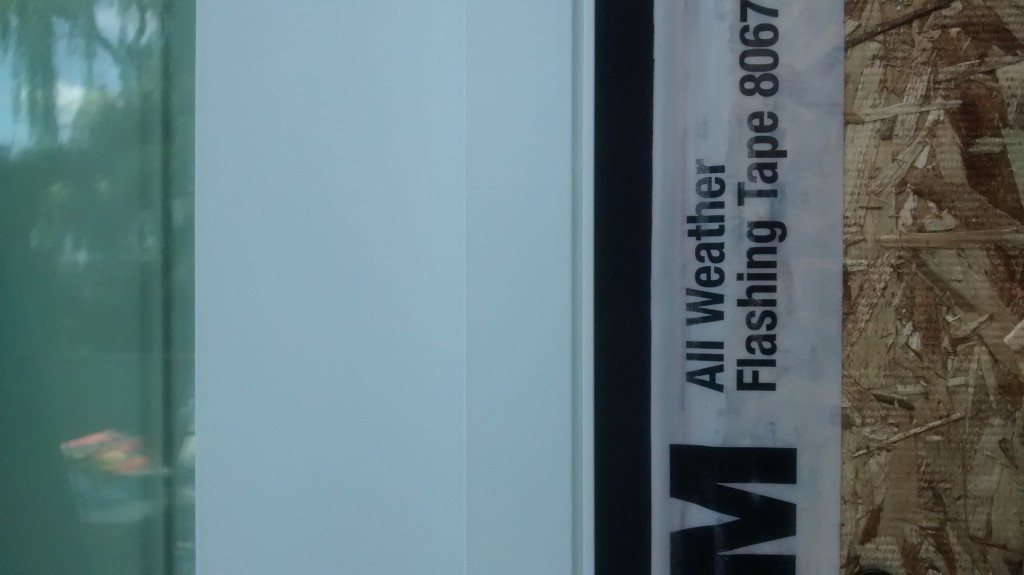
- Flashing Tape 8067 by 3M: A flexible, super adhesive flashing tape with a split-release backer that comes in a variety of widths. It’s less expensive than the European tapes and is made in the USA.
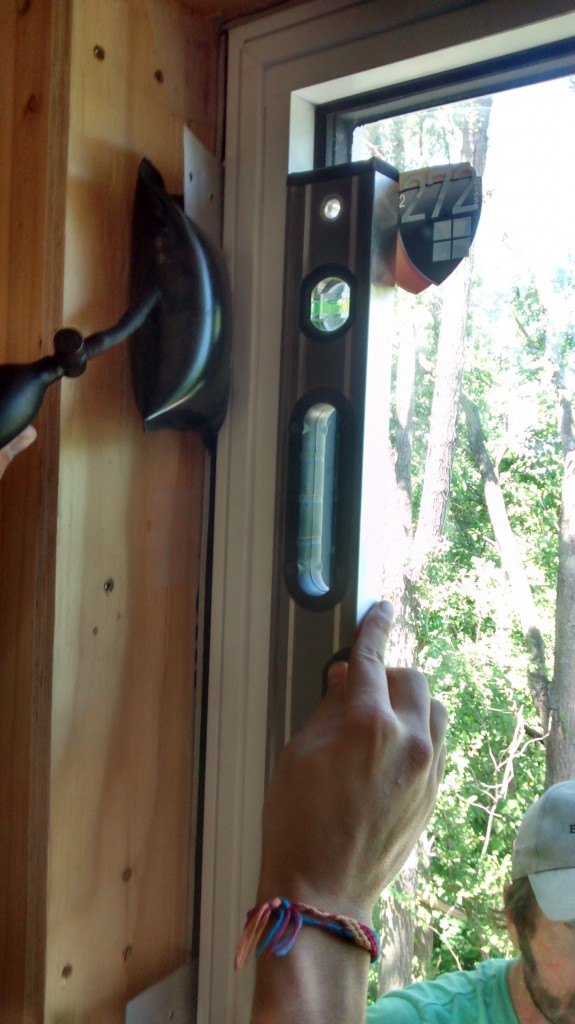
- Suction Cups: Allow for easy and safe handling of glass.
Installation Procedure:
-
R&D: We first built a mock up to try out the new materials and methods; and to demonstrate the procedure to the crew.

- Framing: We always build plumb, level, square, and true framing to get ourselves off to a good start. Because of the thickness of our walls and the 4″ of exterior foam insulation, we built 3/4″ plywood window boxes to span the thickness of the wall.
- Air Sealing 1 and Flashing: The plywood boxes formed part of our air barrier as the transition from the wall air barrier to the window frame. To ensure air barrier continuity, we taped the window boxes to the wall air barrier with 3-M Tape. This step also ensured the rough opening was flashed against weather.
- Sill Preparation: We marked out locations for the U-shims and checked the rough sill for level. We then selected the appropriate number of shims for each stack to achieve a perfectly level sill.
- Applying Expanding Foam Tape: We then cut a length of expanding foam tape about 1″ to 2″ longer than the sill and notch it out at the shim locations. We purchased 4″ wide tape, but kept the shims to 3″ giving at least 1″ of continuous tape around the perimeter. The tape was installed on the sill and “crowded” into the corners as recommended by the manufacturer (Note: the clock is now ticking; the foam tape was expanding and was had to get the window in before it expanded too much!). The tape has a white vapour-impermeable coating on one side, which we want to face to the interior in our climate. We similarly applied the tape to the remainder of the opening and add a bead of sealant at the corners. The tape was scored at the shim and strap anchor locations, as we found that the tape did not fully expand immediately adjacent to these obstructions causing tiny air leaks.
-
Shimming and Securing the Window: We attached the suction cups to the windows and placed them in the opening. The cups made it much easier to install the windows from inside the house. With the window sitting on the levelled sill, we placed an air shim in each of the upper corners and adjusted the frame by gently pumping or releasing air from the shims. Once the jambs were plumbed, we selected an appropriately sized stack of U-shims to place behind the strap anchors and frame and fastened a screw through the anchor. The window was now secured and the air shims were released. The expanding foam tape started to fill all the voids around the window frame creating an airtight seal.
-
Weather Sealing: The final step was to tape the nailing flange onto the exterior sheathing.
Verification
Once all the windows and doors were installed we depressurize the house with a blower door and checked our installation for any air leaks, which we sealed with sealant or expanding polyurethane foam. The system worked: we achieved 0.52 ACH @ 50Pa in a pre-drywall blower door test.
Next Steps
Working with the U-shims and strap anchors was a little awkward and we found that these were the only locations for air leakage. On our next installation, I would like to try the self-shimming screws instead of strap anchors. We would prepare the sill as described above and then apply the expanding foam tape to the rest of the opening. Then we’d place the window and shim it with the air shims, and finally secure it with the self-shimming screws driven right through the tape. Hopefully, we’ll be doing this soon and will let you know how it goes!